
In the previous article, we successfully ran our first website locally.
👉 Hugo × GitHub Pages – Part 1: Running Your First Site Locally with Hugo
In this article, we will walk through how to deploy your site to GitHub Pages and use GitHub Actions to automate the workflow. Getting your site online is actually much easier than it sounds!
1. What Is GitHub Pages?#
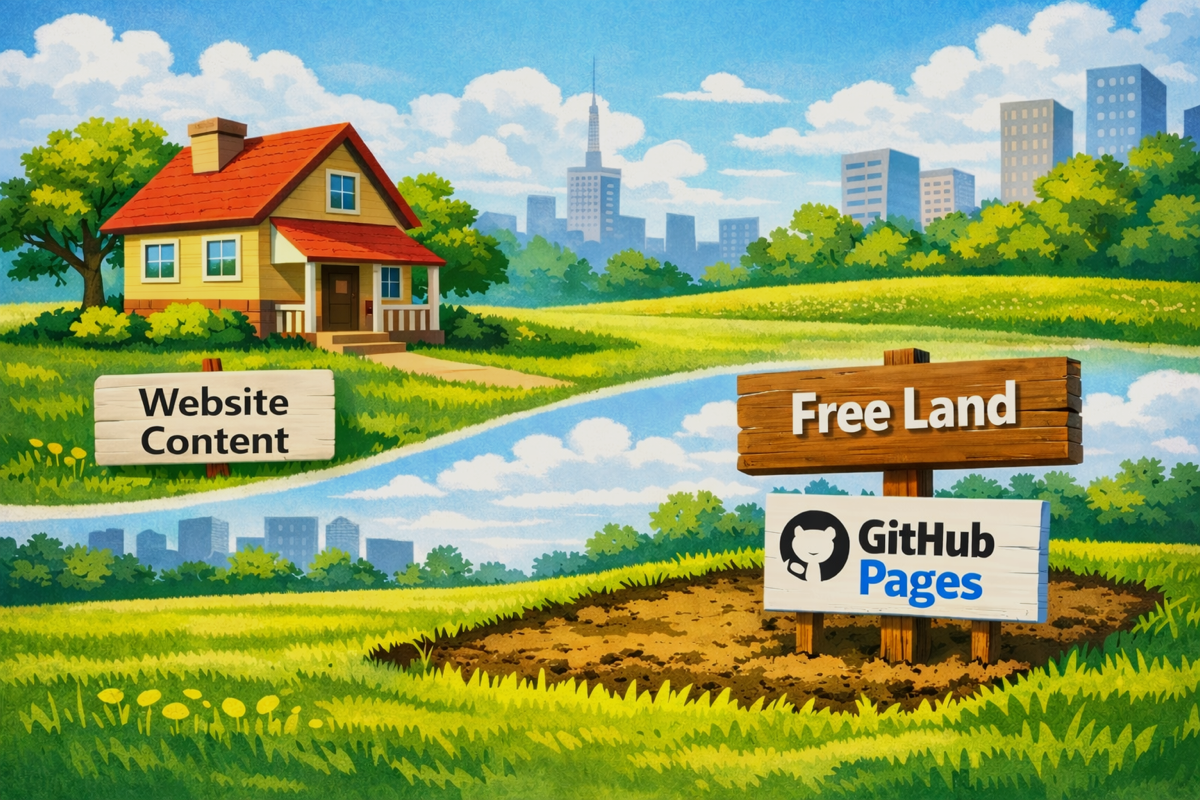
GitHub Pages is a free static site hosting service provided by GitHub. It allows you to publish a website directly from a repository.
Put simply: if we think of the compiled site under the public/ directory from the previous article as a house, then GitHub Pages is the land that the house sits on. And it’s free land — hard to say no to that 😄

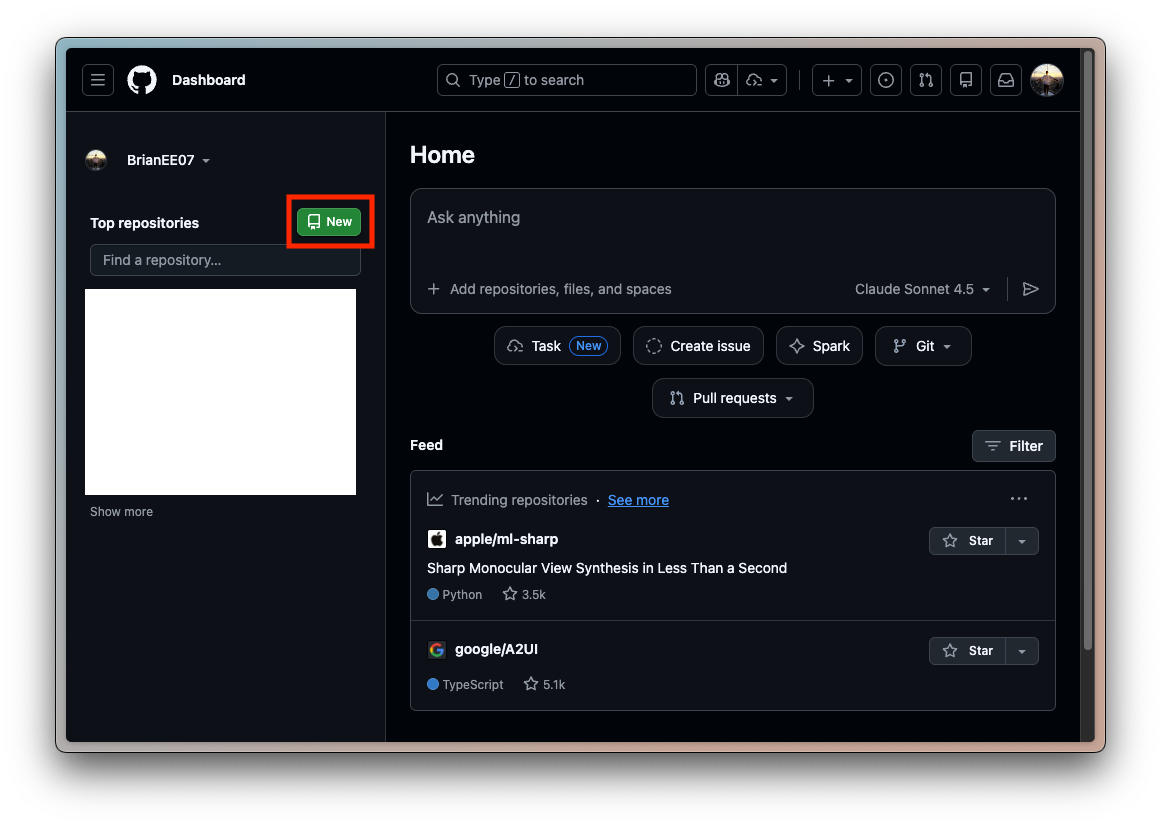
2. Create a New GitHub Repository#
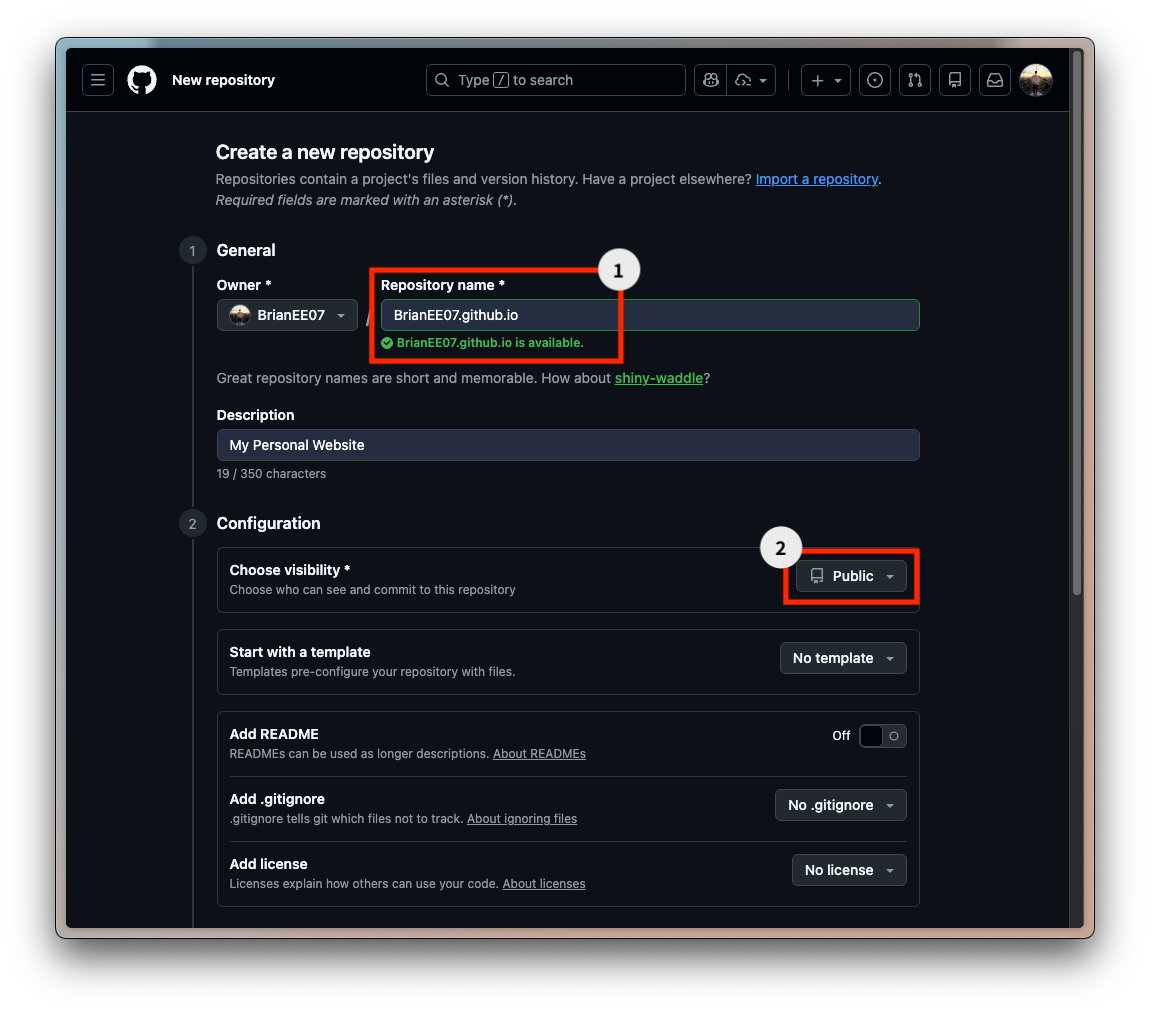
First, create a repository on GitHub (we’ll refer to it as a “repo” below).
It is recommended to name the repo:
<username>.github.ioMake sure the repository is set to public. With this naming convention, no additional configuration is required.
GitHub Pages URL Rules:
| Type | URL | Description |
|---|---|---|
| User Site | https://<username>.github.io/ | One per account |
| Project Site | https://<username>.github.io/<repo-name>/ | One per repository |
If the repository name is <username>.github.io, GitHub Pages treats it as a user site. Any other repository name will be deployed as a project site.
3. Deployment Options#
There are two ways to deploy a Hugo site to GitHub Pages. The first (legacy) method is simpler to understand but requires more manual steps. The second approach, using GitHub Actions, is highly recommended. 👉 Method 2 (GitHub Actions)
Method 1: Legacy Manual Deployment#
Create a directory next to your Hugo project (e.g. mysite/) named <username>.github.io:
mkdir BrianEE07.github.io
cd BrianEE07.github.io
Initialize the repository (replace with your own username):
echo "# BrianEE07.github.io" >> README.md
git init
git add README.md
git commit -m "Initial commit"
git branch -M main
git remote add origin https://github.com/BrianEE07/BrianEE07.github.io.git
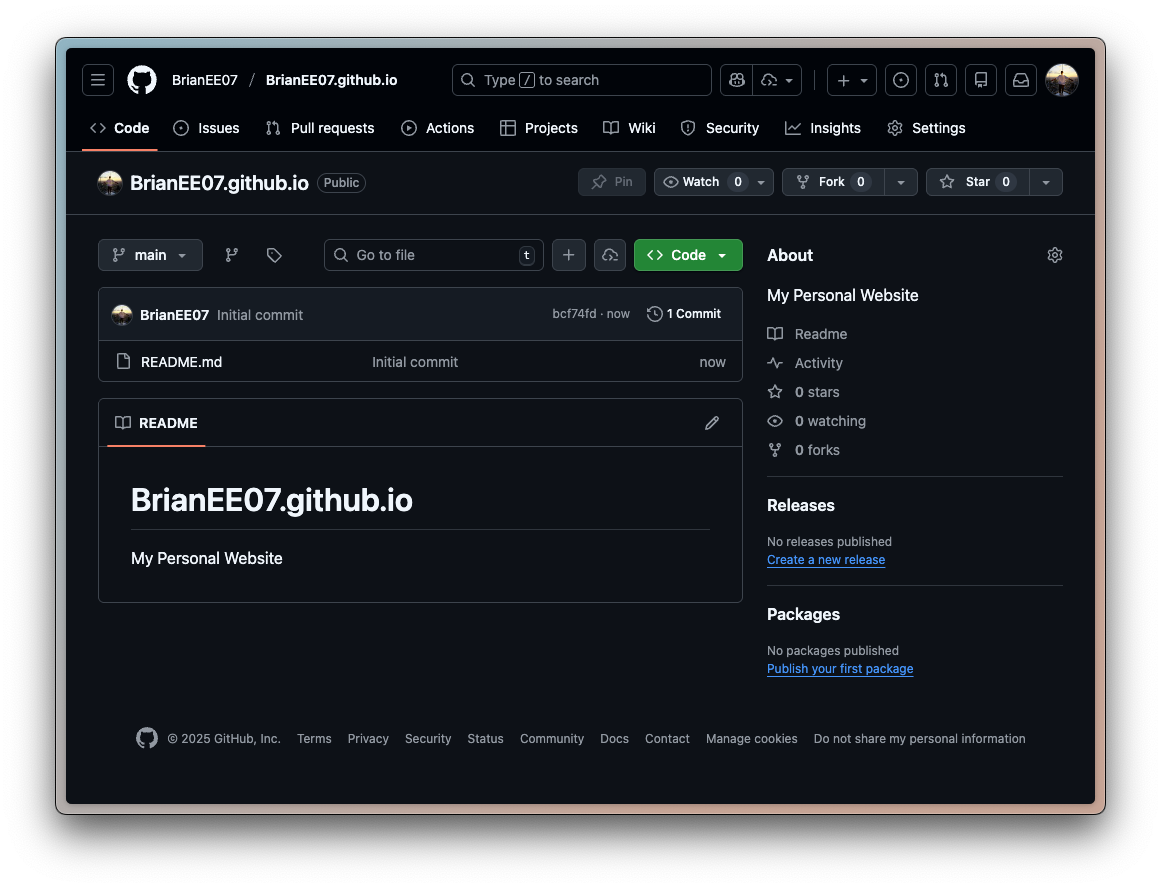
git push -u origin mainYour repo should now look like this:
Go back to your Hugo project:
cd ../mysiteBuild the site:
rm -rf public # To clean up previously compiled build output
hugo
Copy the generated files under public/ into the local repo and push:
cp -r public/* ../BrianEE07.github.io
cd ../BrianEE07.github.io
git add .
git commit -m "add my first post"
git push
When you see a green checkmark ✅ under Deployments on GitHub, the site is live. (It may take a moment.)

Finally, you can visit https://<username>.github.io/ to see your updated site! For example, in my case it’s https://brianee07.github.io/posts/.
(If something looks wrong, try opening it in an incognito/private window.)
Posts with draft = true will not be built by hugo. Set it to false to publish.
After that, whenever you update the site, just run the hugo build, copy, and upload process again.
Method 2: Recommended — GitHub Actions#
I initially used Method 1, but having to manually copy files before every push quickly became tedious. Later, I found a more automated approach online. This is also the method recommended in the official Hugo documentation, so you can think of it as a more or less “set it once and forget it” solution.
Simply put, this approach pushes the Hugo project
mysite/directly to the<username>.github.ioGitHub repository. After each push, GitHub automatically runs the Hugo build and deployment process.
First, create a .gitignore file in your Hugo project directory mysite/:
touch .gitignoreAdd the paths that should not be pushed to GitHub by editing .gitignore:
# =========================
# Hugo
# =========================

# Hugo build output
public/
resources/

# Hugo build lock
.hugo_build.lock

# =========================
# OS / Editor
# =========================

# macOS
.DS_Store
We ignore public/ because GitHub will build the site in the cloud.
When editing articles, it is still strongly recommended to run hugo server locally to build and preview the site before pushing. This helps avoid unnecessary back-and-forth debugging.
Push the project to GitHub (since git init was already run when installing the theme, you don’t need to do it again):
git add .
git remote add origin https://github.com/BrianEE07/BrianEE07.github.io.git
git branch -M main
git commit -m "Initial commit"
git push -u origin main
Initial failures are expected because GitHub Pages tries Jekyll by default.
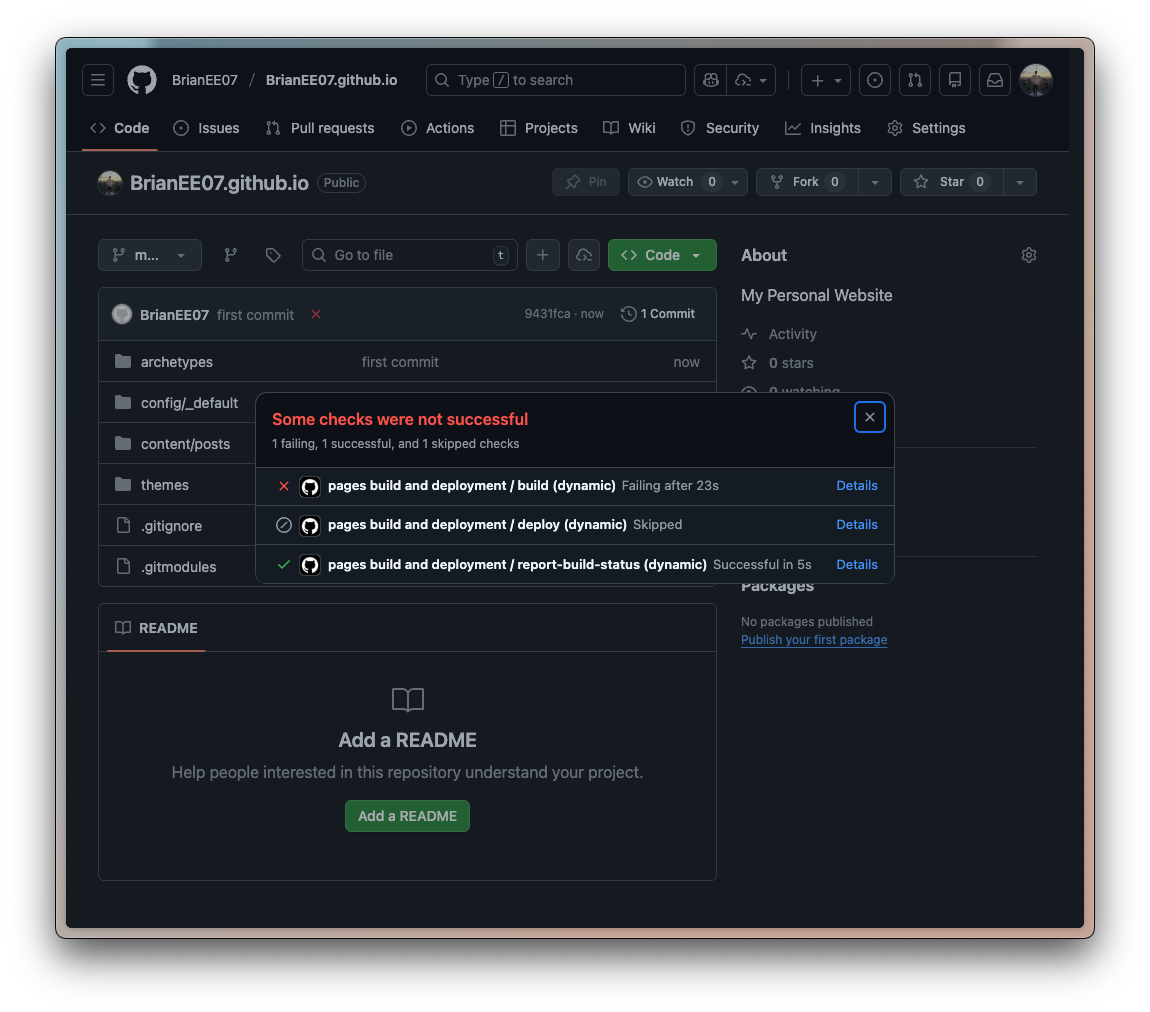
This also shows that if anything goes wrong in the automated process, it will stop immediately, ensuring that only a correct version of the site gets deployed. You can click Details to see exactly what went wrong.
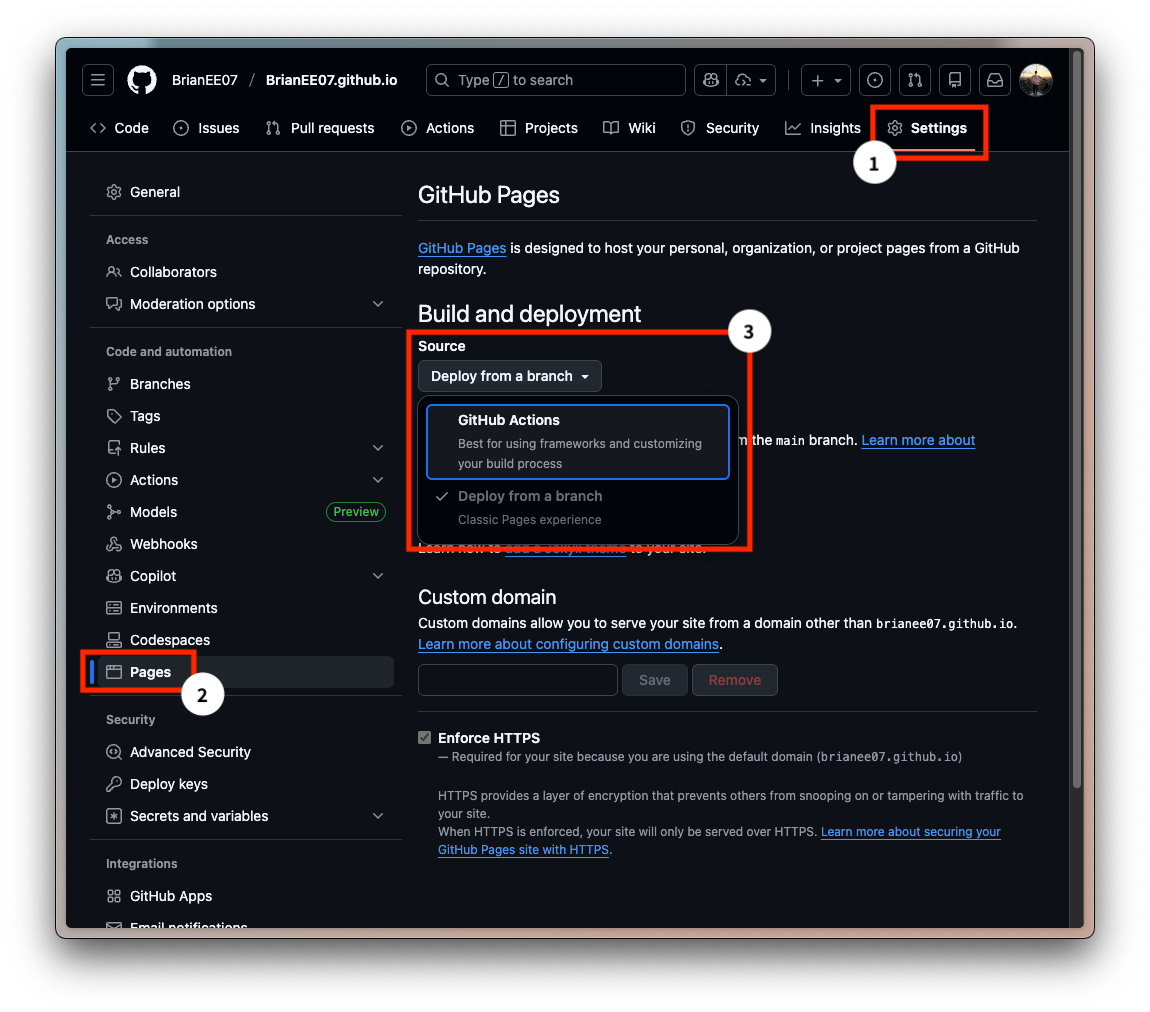
Next, we need to set up the automation workflow. Go to Settings → Pages → Build and deployment, and change Source to GitHub Actions.
(By contrast, Method 1 uses the default Deploy from a branch option.)
Then, create .github/workflows/hugo.yaml in your local mysite/ directory:
mkdir -p .github/workflows
touch .github/workflows/hugo.yaml
Edit the file as follows. You can also copy this directly from the official Hugo documentation. In short, this file defines the automated steps for GitHub Actions:
name: Build and deploy
on:
  push:
    branches:
      - main
  workflow_dispatch:
permissions:
  contents: read
  pages: write
  id-token: write
concurrency:
  group: pages
  cancel-in-progress: false
defaults:
  run:
    shell: bash
jobs:
  build:
    runs-on: ubuntu-latest
    env:
      DART_SASS_VERSION: 1.97.1
      GO_VERSION: 1.25.5
      HUGO_VERSION: 0.153.1
      NODE_VERSION: 24.12.0
      TZ: Europe/Oslo
    steps:
      - name: Checkout
        uses: actions/checkout@v5
        with:
          submodules: recursive
          fetch-depth: 0
      - name: Setup Go
        uses: actions/setup-go@v5
        with:
          go-version: ${{ env.GO_VERSION }}
          cache: false
      - name: Setup Node.js
        uses: actions/setup-node@v4
        with:
          node-version: ${{ env.NODE_VERSION }}
      - name: Setup Pages
        id: pages
        uses: actions/configure-pages@v5
      - name: Create directory for user-specific executable files
        run: |
          mkdir -p "${HOME}/.local"
      - name: Install Dart Sass
        run: |
          curl -sLJO "https://github.com/sass/dart-sass/releases/download/${DART_SASS_VERSION}/dart-sass-${DART_SASS_VERSION}-linux-x64.tar.gz"
          tar -C "${HOME}/.local" -xf "dart-sass-${DART_SASS_VERSION}-linux-x64.tar.gz"
          rm "dart-sass-${DART_SASS_VERSION}-linux-x64.tar.gz"
          echo "${HOME}/.local/dart-sass" >> "${GITHUB_PATH}"
      - name: Install Hugo
        run: |
          curl -sLJO "https://github.com/gohugoio/hugo/releases/download/v${HUGO_VERSION}/hugo_extended_${HUGO_VERSION}_linux-amd64.tar.gz"
          mkdir "${HOME}/.local/hugo"
          tar -C "${HOME}/.local/hugo" -xf "hugo_extended_${HUGO_VERSION}_linux-amd64.tar.gz"
          rm "hugo_extended_${HUGO_VERSION}_linux-amd64.tar.gz"
          echo "${HOME}/.local/hugo" >> "${GITHUB_PATH}"
      - name: Verify installations
        run: |
          echo "Dart Sass: $(sass --version)"
          echo "Go: $(go version)"
          echo "Hugo: $(hugo version)"
          echo "Node.js: $(node --version)"
      - name: Install Node.js dependencies
        run: |
          [[ -f package-lock.json || -f npm-shrinkwrap.json ]] && npm ci || true
      - name: Configure Git
        run: |
          git config core.quotepath false
      - name: Cache restore
        id: cache-restore
        uses: actions/cache/restore@v4
        with:
          path: ${{ runner.temp }}/hugo_cache
          key: hugo-${{ github.run_id }}
          restore-keys:
            hugo-
      - name: Build the site
        run: |
          hugo \
            --gc \
            --minify \
            --baseURL "${{ steps.pages.outputs.base_url }}/" \
            --cacheDir "${{ runner.temp }}/hugo_cache"
      - name: Cache save
        id: cache-save
        uses: actions/cache/save@v4
        with:
          path: ${{ runner.temp }}/hugo_cache
          key: ${{ steps.cache-restore.outputs.cache-primary-key }}
      - name: Upload artifact
        uses: actions/upload-pages-artifact@v3
        with:
          path: ./public
  deploy:
    environment:
      name: github-pages
      url: ${{ steps.deployment.outputs.page_url }}
    runs-on: ubuntu-latest
    needs: build
    steps:
      - name: Deploy to GitHub Pages
        id: deployment
        uses: actions/deploy-pages@v4
Yes, it’s long — but you can just copy and paste it. 😄
Next, edit config/_default/hugo.toml (by default, this file is hugo.toml under mysite/. Since we used the Blowfish theme in the previous article, the file is located under config/_default/).
Add the following configuration somewhere in the file:
[caches]
  [caches.images]
    dir = ':cacheDir/images'
Finally, push everything to GitHub (if you encounter issues, see 👉 Troubleshooting):
git add .
git commit -m "add actions workflow YAML"
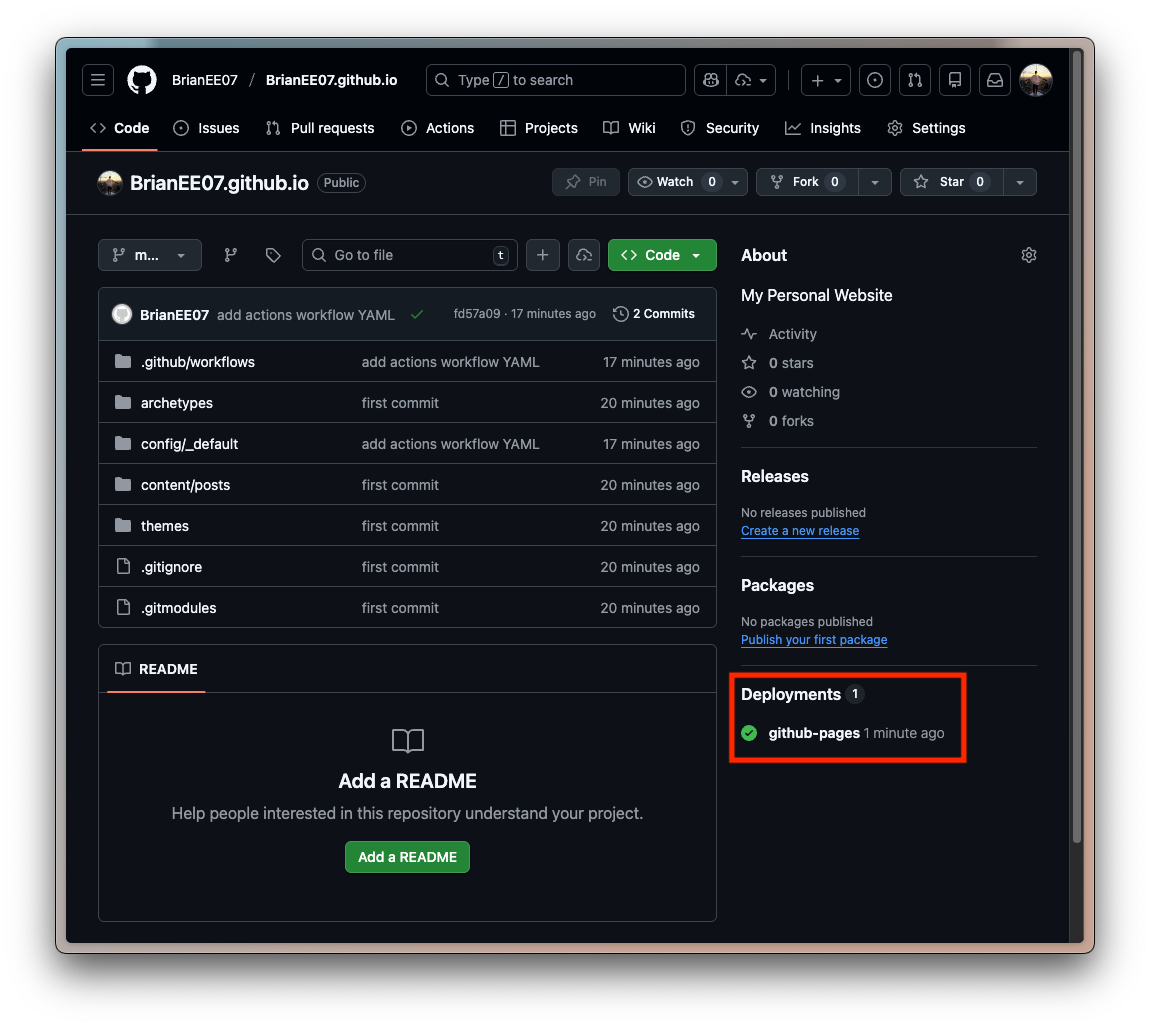
git pushWhen you see a green checkmark ✅ under Deployments on GitHub, the site is live. (It may take a moment.)
Finally, you can visit https://<username>.github.io/ to see your updated site! For example, in my case it’s https://brianee07.github.io/posts/.
(If something looks wrong, try opening it in an incognito/private window.)
Posts with draft = true will not be built. Set it to false to publish.
From now on, updating the site only requires pushing your changes to GitHub again.
Troubleshooting#
If you see the following error when running git push, it means your token does not have sufficient permissions:
! [remote rejected] main -> main (refusing to allow a Personal Access Token to create or update workflow `.github/workflows/hugo.yaml` without `workflow` scope)
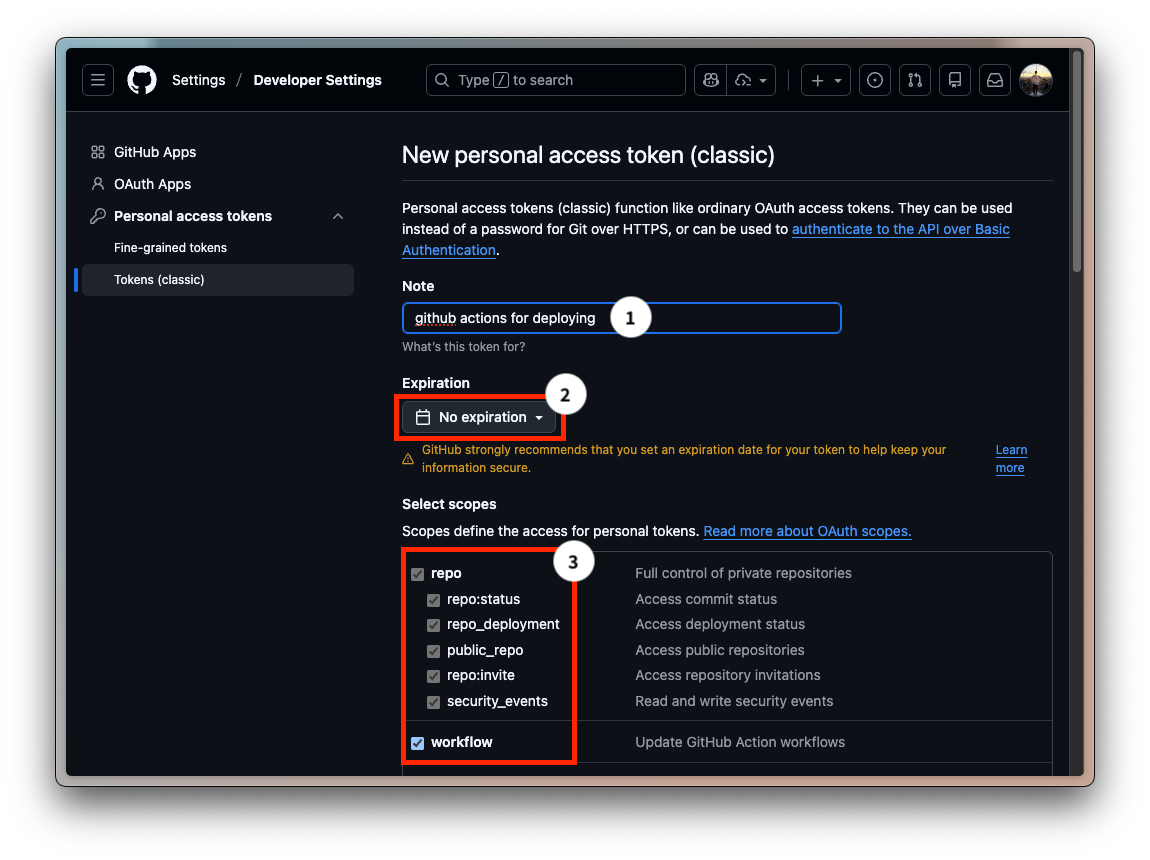
error: failed to push some refs to 'https://github.com/BrianEE07/BrianEE07.github.io.git'Go to your GitHub profile picture (top-right) → Settings → Developer Settings → Personal access tokens → Tokens (classic) → Generate new token (classic).
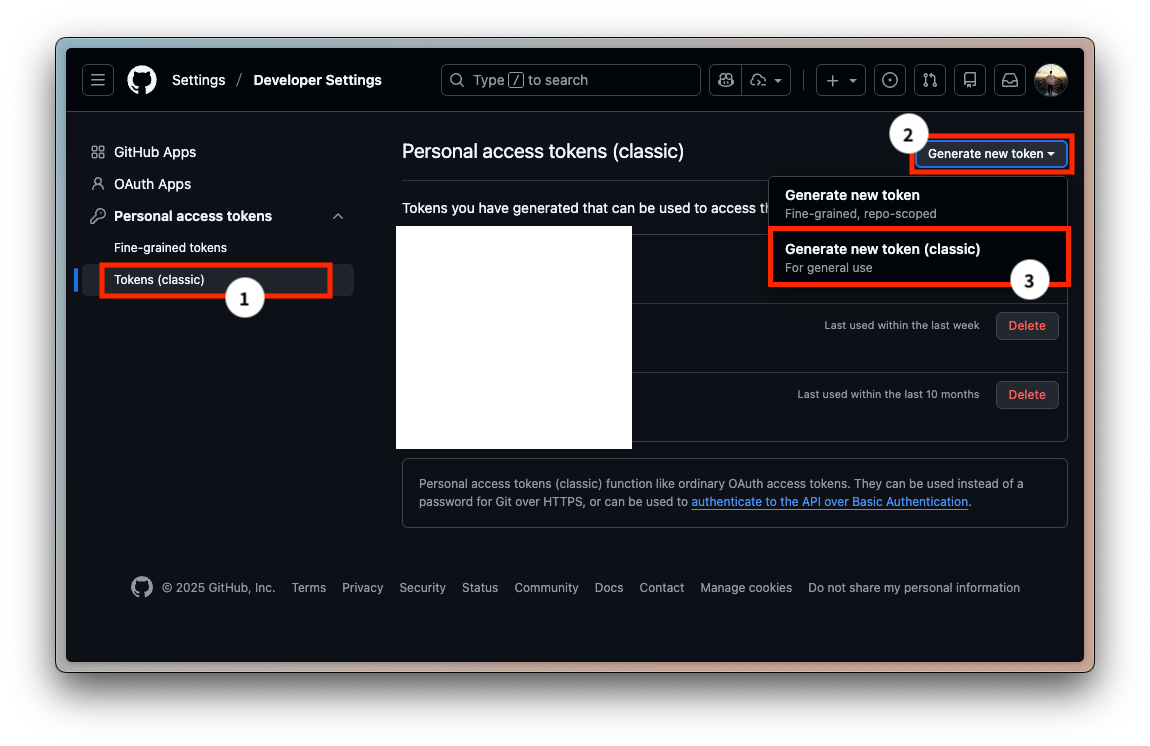
Make sure both Repo and Workflow are checked.
Then click Generate token, copy the token (it will only be shown once), and update your local Git credentials:
security delete-internet-password -s github.com
git push # re-enter your GitHub username and the newly generated token
4. What If You Want to Use Your Own Domain?#
If you open this URL, https://brianee07.github.io/, you’ll notice that it redirects to https://weiweifan.com/.
In the next article, I’ll explain how to set up your own custom domain.
FAQ (Method 2)#
Q1: Why configure caches.images?#
[caches]
  [caches.images]
    dir = ':cacheDir/images'
This is used to cache Hugo’s image processing results. When using functions like Resize, Fit, or Fill, images will be reprocessed on every build if caching is not enabled. It is recommended to configure this in CI environments (such as GitHub Actions); the impact on local builds is minimal.
Q2: Is it difficult to migrate to another hosting platform later?#
No. Content and deployment are decoupled. You don’t need to change your content—only the deployment method and DNS settings (if you use a custom domain).
The deployment method can be changed to:
- Modify GitHub Actions to deploy to a new platform.
- Or use the hosting platform’s built-in build system and simply delete
.github/workflows/to disable GitHub Actions.