
In the previous article, we placed our website content—the “house”—on the “land” provided by GitHub Pages.
👉 Hugo × GitHub Pages – Part 2: First Deployment with GitHub Actions
In this article, we’ll go a step further by introducing the basics of domain names, how to purchase your own domain, and how to configure a custom domain for GitHub Pages.
1. What Is a Domain Name?#
If we compare a website to a house, then a domain name is like your home address.
Its purpose is to replace hard-to-remember IP addresses with something more human-friendly, so users can find your website (house) more easily.
For example, computers communicate using IP addresses (such as 142.250.72.206), which are not intuitive for humans. That’s why domain names like example.com exist.
The DNS (Domain Name System) mentioned later is responsible for the following task:
Converting the domain name you enter into an IP address that computers can actually understand.
Before configuring a custom domain, a website hosted on GitHub Pages will have a default URL like this:
https://<username>.github.ioAs soon as you see this URL, you know the site is hosted on GitHub Pages.
Once you have your own domain name, the URL becomes:
https://example.comNot only does this look cleaner, it also feels much more like “your own” website.
Domain Hierarchy Basics#
A complete domain name can usually be broken down into the following levels:
| Level | Example | Description |
|---|---|---|
| Top-Level Domain (TLD) | .com, .io, .org, .tw | The rightmost part of a domain, indicating its type or region |
| Second-Level Domain (SLD) | example.com(example) | The actual domain name you purchase and own; the main identifier of the site |
| Subdomain | www.example.com(www) | An extension built on top of the second-level domain, often used to separate services or purposes |
As you can see, domain names are extended by adding prefixes to the left, while the top-level domain on the far right serves as the starting point of the entire structure.
Why Use Your Own Domain Name?#
Setting up a custom domain usually has several practical benefits:
- More professional and recognizable
- A personal website, technical blog, or portfolio no longer looks tied to a specific platform
- Decoupled from the hosting provider
- The URL belongs to you, not GitHub; even if you switch hosting platforms later, the URL does not need to change
- Better for long-term operation
- Helps accumulate SEO value and makes sharing easier, such as using the link on business cards or resumes
What is SEO?
SEO (Search Engine Optimization) refers to a set of techniques used to optimize a website’s content and structure so that search engines can better understand and index it, improving its ranking and visibility in search results.
2. Buying Your Own Domain with Namecheap#
This part requires a small purchase. A domain usually costs a few hundred TWD per year, which works out to just a few dozen per month. For a clean, personal URL, I think it’s worth it.
First, go to the Namecheap website and search for a domain name you like. Other large domain registrars include GoDaddy and Gandi; the choice mainly comes down to personal preference.

You’ll see results like the following:
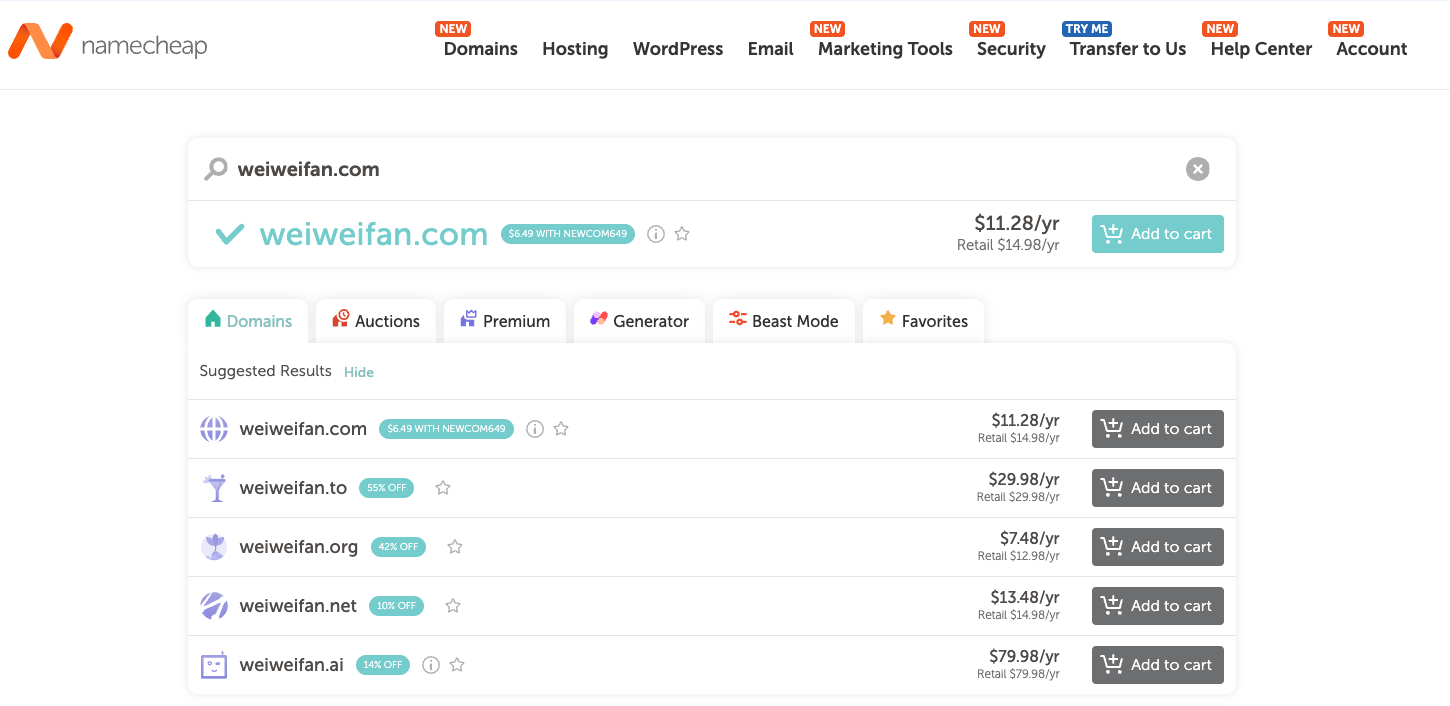
If the domain is available, you’ll see Add to cart. Different top-level domains have different prices; commonly chosen ones include .com, .io, .net, and .me.
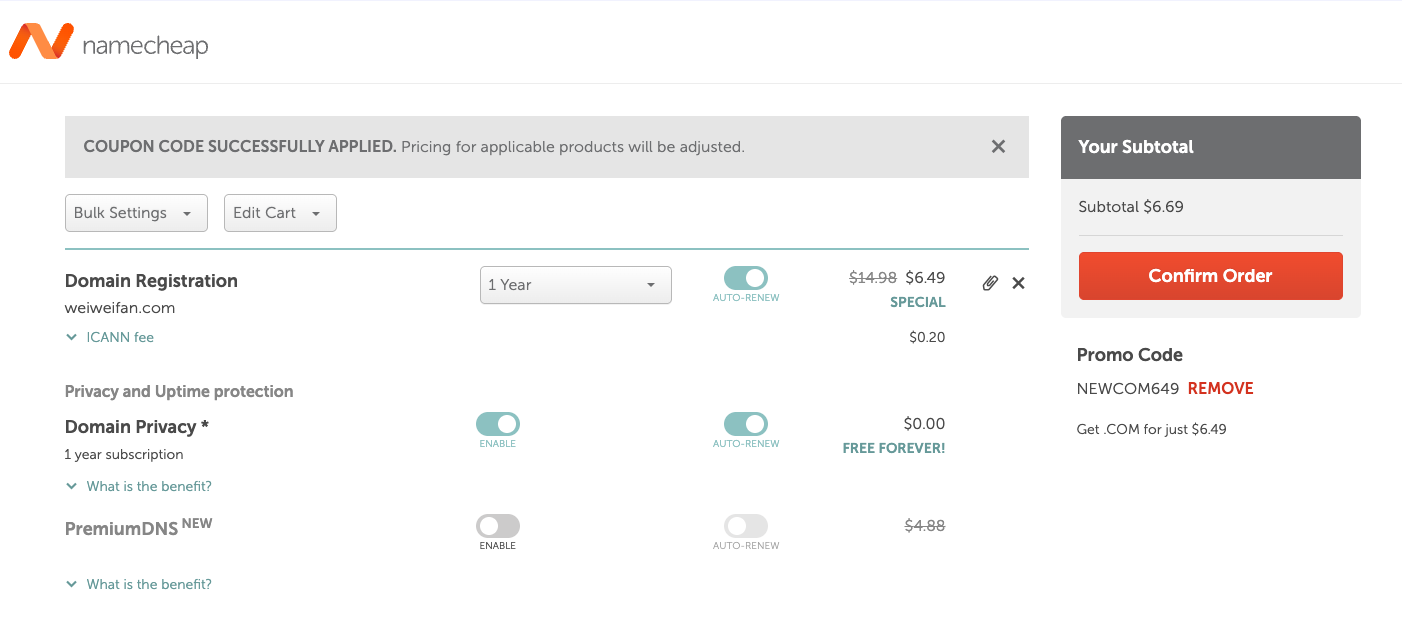
Next, proceed through the registration and checkout process. You can leave AUTO-RENEW enabled to avoid forgetting to renew the domain after one year. At this stage, there is no need to purchase an additional SSL certificate, as GitHub Pages will automatically provide and configure HTTPS later.
What is SSL?
SSL (Secure Sockets Layer) is an encryption technology that secures data transmission between users and websites, preventing eavesdropping or tampering. Once enabled, a site switches from HTTP to HTTPS.
After a successful purchase, you’ll receive an order confirmation email:
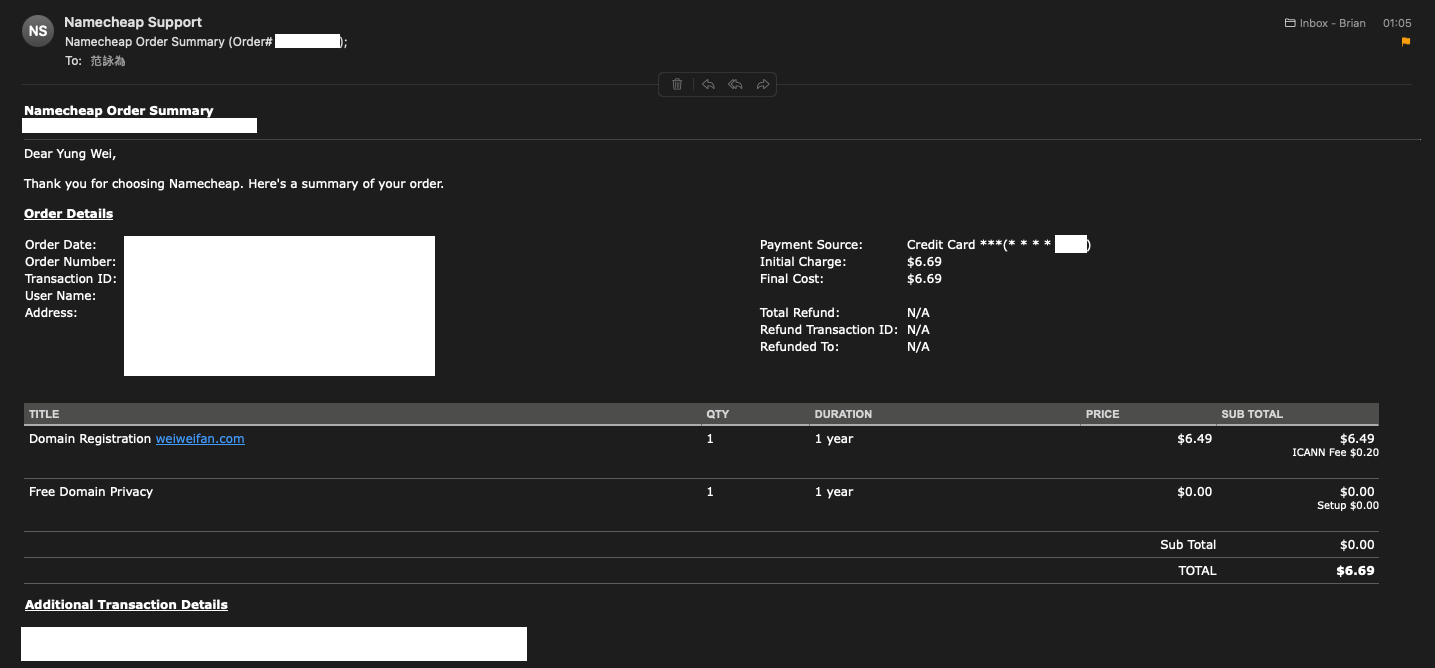
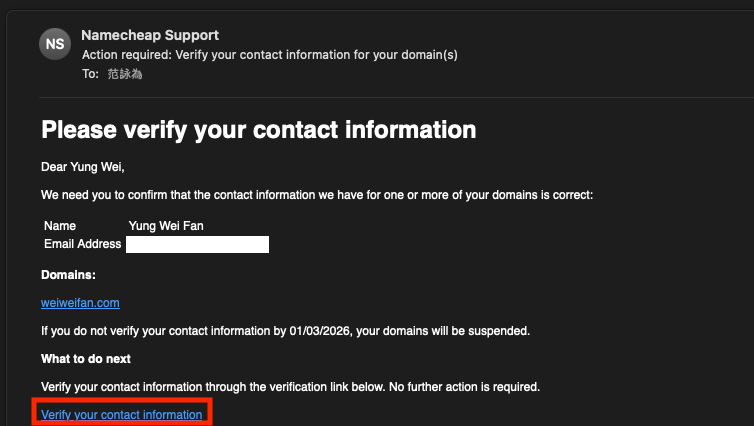
Don’t forget to click the verification link in the other email you receive:
3. Configuring DNS on Namecheap#
Next, we’ll configure DNS so that the domain name you enter can be correctly translated into an IP address.
Go to Account → Dashboard:
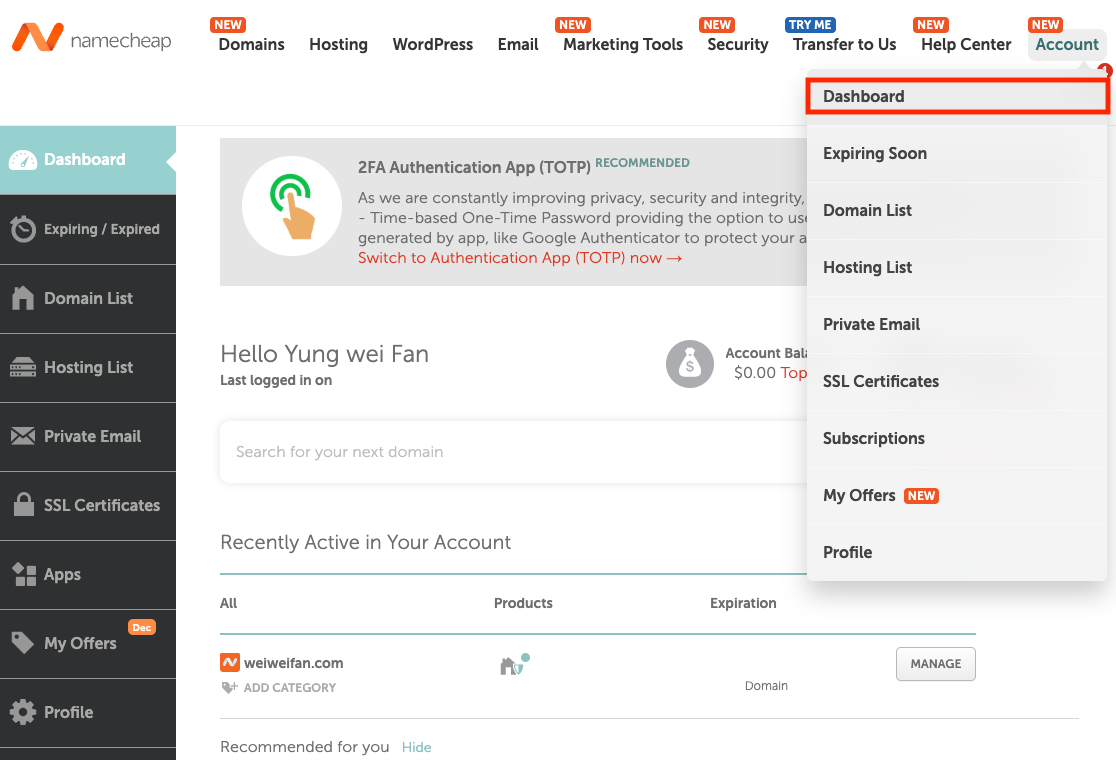
Find the domain you just purchased and click MANAGE:

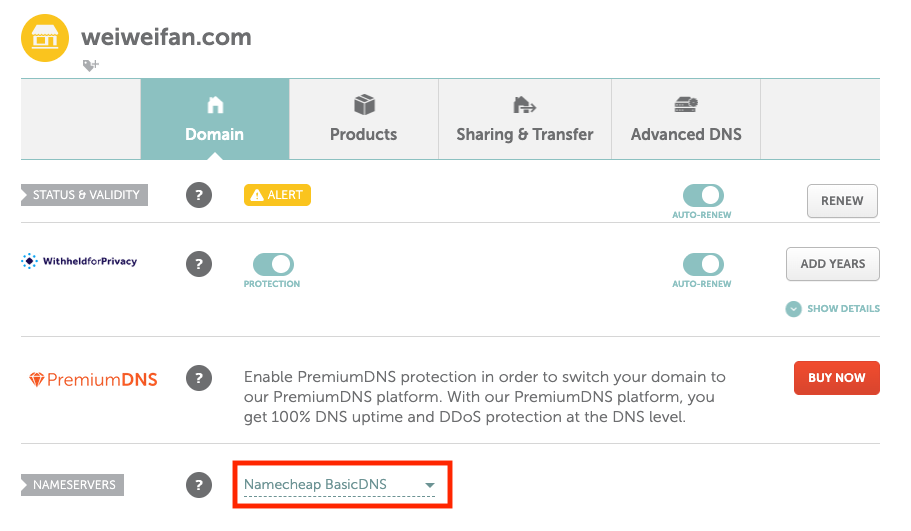
On the Domain page, select Namecheap BasicDNS:
Switch to the Advanced DNS tab and add A Records using the following four IP addresses:
185.199.108.153
185.199.109.153
185.199.110.153
185.199.111.153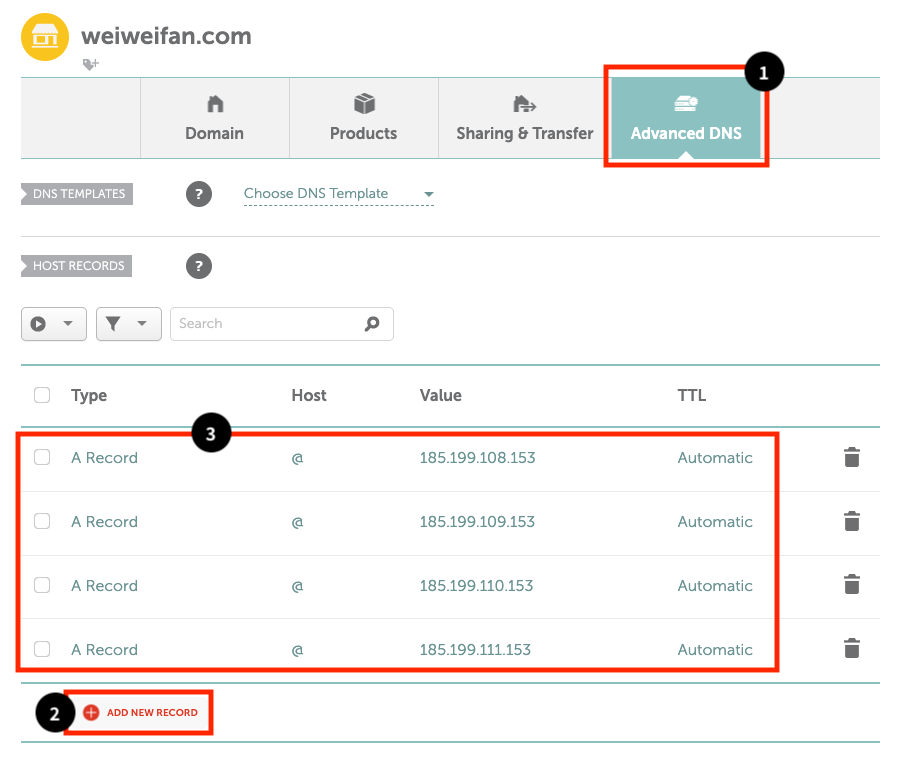
These are the official IP addresses used by GitHub Pages. By configuring them, you are pointing your domain to where GitHub Pages hosts your site.
Next, add a CNAME Record as shown below. For the Value, enter <username>.github.io, which was configured in the previous article.
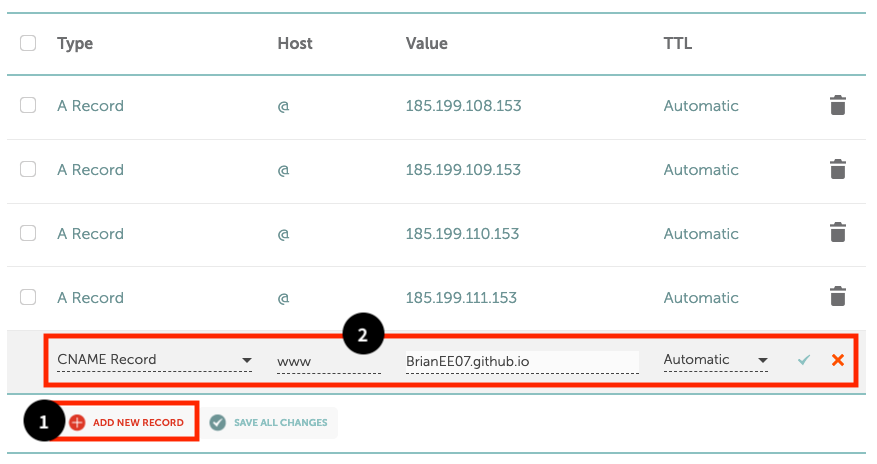
What’s the difference between an A Record and a CNAME?
The A Record handles the apex domain (weiweifan.com), while the CNAME handles subdomains (www.weiweifan.com), allowing both to point to the same GitHub Pages site.
4. Setting a Custom Domain on GitHub Pages#
We’re almost there. GitHub Pages provides built-in support for custom domains, and we just need to configure it.
First, go back to your local project and edit hugo.toml (if you followed the setup from previous articles, the file will be under config/_default/; with the default structure, it’s in the project root). Update the baseURL to your own domain:
baseURL = "https://weiweifan.com/"Push the change to GitHub:
git add .
git commit -m "update baseURL to https://weiweifan.com/"
git push
Back on GitHub, go to your <username>.github.io repository → Settings → Pages. Enter your domain name under Custom domain, then click Save.
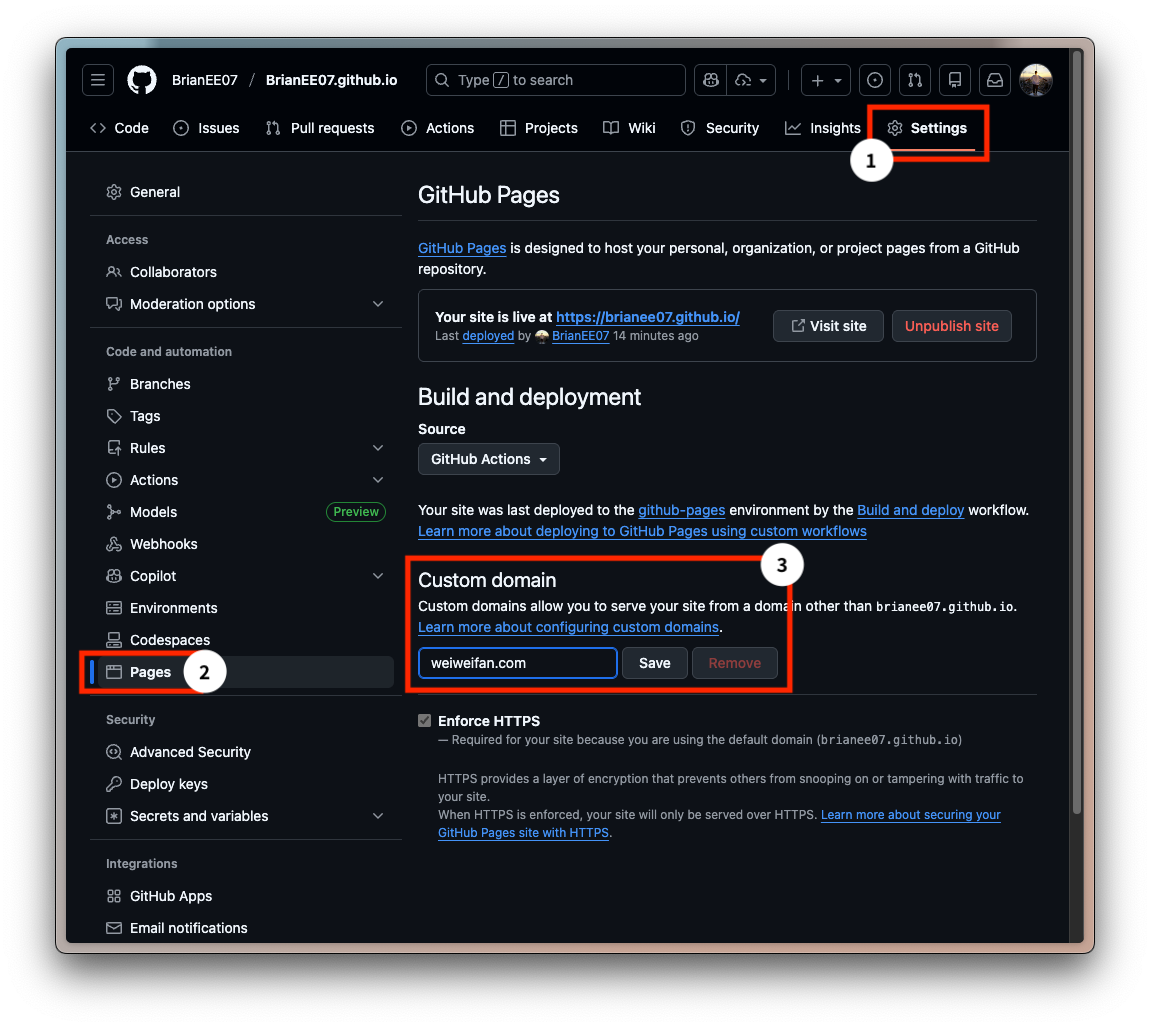
Wait for the DNS check to complete (this usually takes only a few minutes):
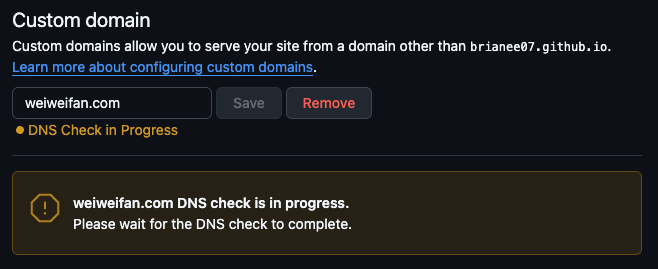
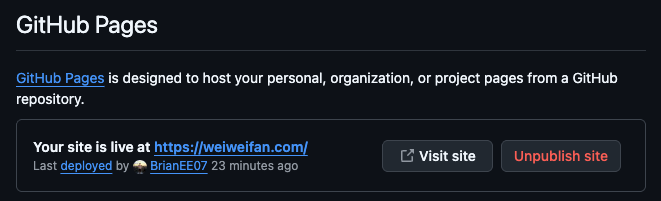
Once the check passes:
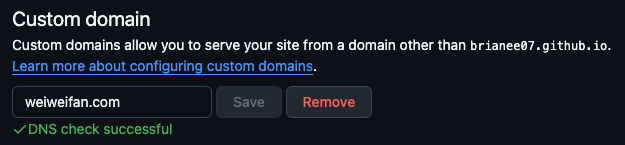
Then enable Enforce HTTPS. GitHub Pages will automatically request a free SSL certificate from Let’s Encrypt, so no manual configuration is required. If the option is temporarily unavailable, refresh the page and try again. If it still doesn’t work, clear the Custom domain field, re-enter it, and wait a bit longer.

After everything is set up, visit https://weiweifan.com to confirm that the site loads correctly. You can also check https://www.weiweifan.com — both URLs should work.
At this point, you can take a short break. As long as the domain itself does not change, switching hosting platforms later usually won’t immediately erase the SEO value you’ve already accumulated.
The next article will introduce how to set up Google Analytics and Google Search Console to track traffic and user behavior on a static website, and help Google index your site more quickly and accurately.
👉 Hugo × GitHub Pages – Part 4: Google Analytics and Search Console for Traffic Tracking and Indexing